In this blog post, we get into the details of how to add Facebook dynamic product ad tracking in Shopify.
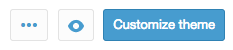
The code snippet below should be placed in between <head> and </head> on every page of your website. The best place to do this is in the theme.liquid template file, as this will be loaded on all pages. To get to this file, go to the Shopify dashboard, click on the tab labelled 'Themes' and then click on the 'Customize theme' button:
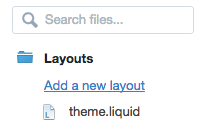
On the next screen click on 'Edit HTML/CSS' and locate the layout file labelled 'theme.liquid':
Add this code to the file, ensuring that the <ad_account_pixel_id> placeholder (including the angled brackets <>) is replaced with your WCA pixel ID (both highlighted in red).
<script>(function() { var _fbq = window._fbq || (window._fbq = []); if (!_fbq.loaded) { var fbds = document.createElement('script'); fbds.async = true; fbds.src = '//connect.facebook.net/en_US/fbds.js'; var s = document.getElementsByTagName('script')[0]; s.parentNode.insertBefore(fbds, s); _fbq.loaded = true; } _fbq.push(['addPixelId', '<ad_account_pixel_id>']); })(); window._fbq = window._fbq || []; window._fbq.push(['track', 'PixelInitialized', {}]); </script> <noscript><img height="1" width="1" alt="" style="display:none" src="https://www.facebook.com/tr?id=<ad_account_pixel_id>&ev=PixelInitialized" /></noscript>
There are 3 Events that need to be implemented:
View Content & Add To Cart Events
Normally the 'ViewContent' and 'AddToCart' events can be tracked on the same page, the "product.liquid" template. Again, click on the tab labelled 'Themes' and then click on the 'Customize theme' button: Find and click on the 'product.liquid' file in the 'Templates' folder on the left hand side:
Add the following code to the file:
<script>
 $(function() {
 // ViewContent Event
 window._fbq.push(['track', 'ViewContent', {content_ids: [""], content_type: 'product'}]);
 // Listen for 'AddToCart' event, and tag
 $('.addtocart').click(function(e) {
 window._fbq.push(['track', 'AddToCart', { content_ids: [""], content_type: 'product'}])
 });
 });
 </script>
Note: The above code sample assumes that the Product ID that is provided in your product feed is the same ID as is returned by 'product.variants.first.id'.
Purchase Event
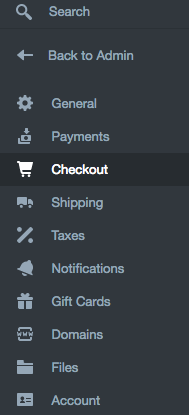
This is different to adding the other two events, as there is no direct access to edit what is on the 'Thank You' page, which is displayed after a successful checkout. In order to add the Purchase Event code, click into "Settings" in the left menu and then click 'Checkout':
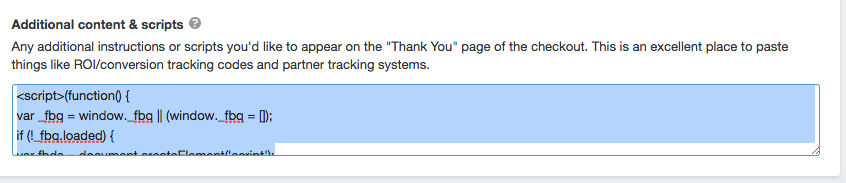
Scroll down on this page and locate the 'Additional content & scripts' section:
Any code entered in this box will be included on the 'Thank You' page. Being careful not to overwrite anything that's in the box already and only add the code below.
Please note:
<!-- Initialise Facebook -->
 <script>
 (function() {
 var _fbq = window._fbq || (window._fbq = []);
 if (!_fbq.loaded) {
 var fbds = document.createElement('script');
 fbds.async = true;
 fbds.src = '//connect.facebook.net/en_US/fbds.js';
 var s = document.getElementsByTagName('script')[0];
 s.parentNode.insertBefore(fbds, s);
 window._fbq.loaded = true;
 }
 window._fbq.push(['addPixelId', '<ad_account_pixel_id>']);
 })();
 <!-- Conversion Event -->
 window._fbq.push(['track', '<conversion_pixel_id>', {'value':'','currency':'<currency>'}]);
 <!-- DPA Event -->
 content_ids = [];

 window._fbq.push(['track', 'Purchase', {content_ids: content_ids, content_type: 'product'}]); </script>
Find more helpful tips on our Frequently Asked Questions page.